Tuesday, July 9, 2013

I just couldn't part with this old crate

My mom brought me an old fruit crate that she found during a trip to Connecticut. I loved the age and rustic appeal that it had, but I couldn't imagine it working in a practical way as a crate. The sides and bottom were made from thin boards and some of those boards were split, but I just couldn't part with the crate.  So, I began carefully taking it apart. 


I had intentions of using the two ends to make signs out of. They were made from thicker boards and had a trim piece of wood at the top and bottom. They had old nails holding them together and a lot of rustic charm.


The first sign I wanted to make was going to say FARM FRESH. I found a simple font and printed the letters out on paper in the size that I wanted to use as a template.


The next step was to color the back of the letters with chalk.


Then placing the paper with the chalk side down and the letters facing up, I traced each letter with a pencil to make a chalk outline on the wood.


I painted the letters with white paint and outlined them with a permanent black sharpie marker.


I sanded the paint a little to distress it and sprayed a clear matte finish over it to protect it. Then I added two eyelets to the top so that I could attach rusty wire to use as a hanger and then...
...more inspiration hit!

Remember the thin boards from the bottom of the crate that were splitting?

 I decided to cut 3 smaller signs from them to hang from this sign.


Using the same chalk, trace and paint technique, I made signs saying EGGS, DAIRY and PRODUCE.


While I was cutting the smaller signs I also drilled small holes on the top and bottom of each end of each sign. I wanted to run rusty wire through them to hang them on the FARM FRESH sign. I also attached two eyelets to the bottom of the FARM FRESH sign and started weaving the wire through each sign.


Once the wire was ran through each sign and attached to the main part - this sign was finished!


I only wish I had space to hang it in my own home. I love how it turned out and that I was able to use the crate!


Here's what I did with the other end of the crate.


There are a few small pieces of the sides of the crate left. Maybe inspiration will hit me at some point and I'll have the perfect project to use them on.

'til next time,
Adina


Linking to:


Friday, July 5, 2013

Old fence boards turned into Fruit Stand Signs

What's a girl to do when her neighbors fence boards are falling off?
 Sneak over and rescue them of course.
 
It seemed like weeks that I drove past these fence boards lying on the ground before I decided to pull over and "clean them up" for a neighbor. Now I have a small pile of perfectly weathered red boards. 


While driving past these boards I had been thinking about what I could do with them and I felt inspired to make a couple Fruit Stand / Farmers Market type signs.
 
 
What fruit?
Strawberries and Cherries seemed to fit the red color on the boards.
 
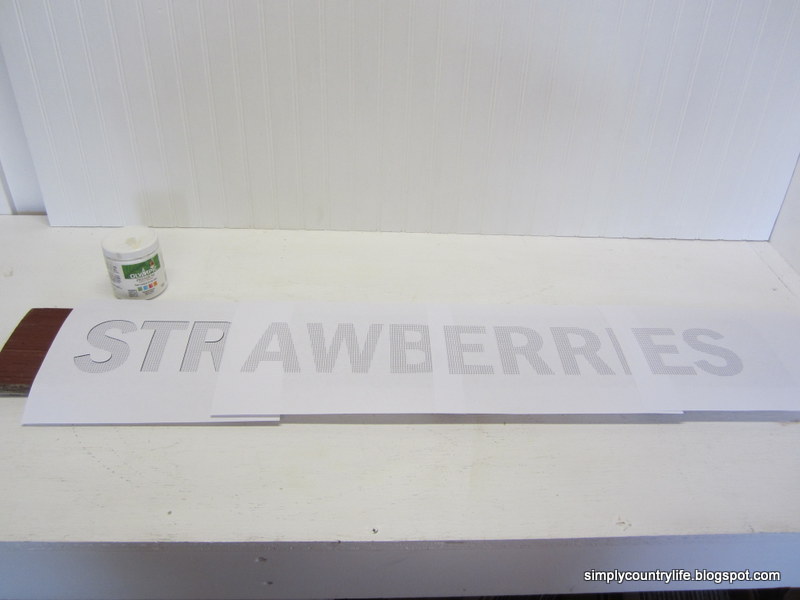
So, I found a font I liked and printed the word STRAWBERRIES. It took four pieces of paper to fit the size font that I wanted.


I taped the backs of the paper together to keep the letters aligned.
 
First, with the letters face up on the paper, I tried to trace them really hard with a pencil to make an indentation outline of each letter, but the wood was too hard and it wasn't making any marks.
 
Next try - I colored the entire back side of the letters with chalk and then placed the chalk side down on the board, with the letter side up and traced the letters again. This time the chalk left an outline on the wood.
 
 
Using a permanent Sharpie marker I traced the chalk outline of each letter and then handpainted inside of the black outline with white paint.
 
 
A quick sanding to distress the letters, a clear matte finish sprayed on the sign and two eyelet hooks added to the top and my first sign was all done!
 
 
I repeated the same process to make the CHERRIES sign except I wrapped rusty wire around each end to hang it with, rather than the eyelet hooks.
 
 
I have a couple of these boards left, but haven't decided what to do with them yet.
Any suggestions?
 
 
'til next time,
Adina
 
 
Linking to:


Monday, September 10, 2012

Upcycled Ornate Frame into a Unique Clock

These vintage metal frames, Made in Italy, turn up every so often at thrift stores and I always seem to scoop them up. Sometimes they have glass or a mirror and sometimes they don't. This guy didn't have anything in the frame other than the original backing. I debated what to do with it. They are popular enough just left empty, but while I was taking the backing out of the frame, it hit me to cover it in burlap. My first thought was to paint a word or silhouette on the burlap and then, I thought, what about a clock?

 
 Why not a clock, so here goes my creative process on this one.
 
The first thing I did was trace the backing of the frame onto burlap, cut the burlap oval out and glue it onto the backing with craft spray adhesive.
 
 
Then I moved onto the frame. I sanded and cleaned it so I could paint it.
 
 
Well, as you can see,  first I painted it white. The white didn't contrast enough with the burlap, so then I painted it black and forgot to take a pic.
 
 
Then I made a quick trip to Hobby Lobby to buy the numbers and the clock mechanism.
My wonderful husband drilled a hole in the middle of the burlap covered backing for me while I spray painted the clock numbers, hands and bolts black. (They were gold).


Once everything was dry, it was time to glue the numbers into their places and assemble the clock mechanism and hands according to the directions on the package.


I placed the required AA battery into the clock and it works!!!
Well, there you have it, my upcycled clock!
 
 
I have 3 additional frames like this in different sizes, any ideas on what to do with them?
Let me know what you think.
 
'til next time,
Adina


Linking to:

Tuesday, June 26, 2012

Scrap Wood Patriotic Star Wreath

While we were building our log cabin, I saved ten small scrap pieces of wood from the burn pile and two years later I have turned them into stars!


I made two identical star wreaths. Each star used five pieces of the wood scraps. I arranged them into a star and glued the pieces together.


Then I brushed a vinegar solution onto them to age the wood. (let rusty metal sit in  vinegar overnight to make this solution)


Once the stars dried for a little while in the sun today I attached red and blue pip berries, along with a burlap bow and an american flag with floral wire.


That's it. All done. I hung one on the front door of our cabin and the other one is for sale in my Etsy shop.


Every time we burned scrap wood while building I cringed. I had plans for all of it, however, my husband kept reminding me that as long as we were building there would be more scraps.

Don't you just love making a project from trash!

'til next time,
Adina


                                                                        Linking to


Monday, June 25, 2012

Patriotic July 4th Planters

I thought I would share a few quick and easy patriotic planters that I put together for the upcoming July 4th holiday.


A little paint added to an old weathered wooden orchid planter gave this plant a quick patriotic touch.


The horizontal wood slats made this an easy project. I just painted every other slat red, the opposite slats cream and a navy square in the corner. I cut two small stars out of a thin piece of wood and painted them with the same cream color and just glued them directly onto the planter. I'm still debating scuffing it up a little to give it a worn look and then sealing it. Actually, I think I will do that tonight!


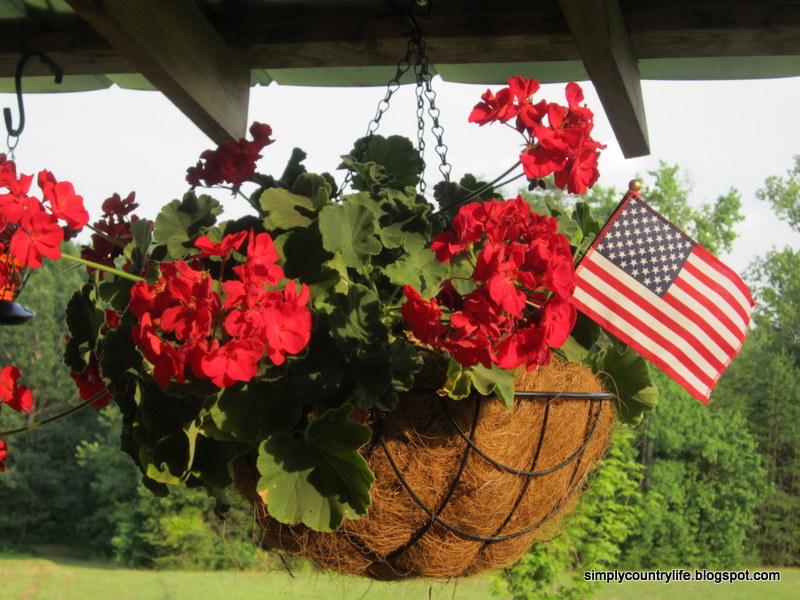
I wanted to add a little holiday decor outside as well, so I stuck small American flags into the three hanging red geraniums on the front porch.


Much to my surprise, while I was watering the plants today, I found a bird nest in one of them that has eggs in it. I hope I didn't disturb it too much.


I have had the joy of watching three different nests of babies grow up and fly away so far this spring and look forward to watching this new nest also!


Lastly, I happened upon this fabulous vintage wheelbarrow at a flea market a couple of months ago and knew I just had to have it.  To add another patriotic touch outside, I planted red, white and blue annuals in it.


I hope you enjoy my patriotic planters as much as I do:)


'til next time,
Adina

Monday, June 4, 2012

Rusty Strainer Planter Mini Makeover

An old rusty strainer turned planter makes a bright and cheerful summer centerpiece!


I love gerber daisies and picked this one up at our local grocery store today to use as a temporary centerpiece. It will get planted outdoors in a couple of weeks, but in the meantime I get all of this cheerfulness on my table!


Half of the fun is finding a unique planter to display it in. I chose an old rusty strainer for this one.


Super easy assembly - Step 1 - place a plastic liner in the bottom of the strainer 


Step 2 - place potted plant in the liner and surround with moss to cover the liner and pot


There you have it!

 Don't you just love finding fun things to use as planters? I know I do.
Let me know if you have any clever ideas for planters. I'd love to hear your thoughts.

'til next time,
Adina