

Showing posts with label farmhouse. Show all posts
Showing posts with label farmhouse. Show all posts
Monday, February 10, 2014
Makeover Mondays - Trashy Bread Box
Monday, December 16, 2013
Wood Christmas Sled Mini Makeover

It's definitely cute, but I decided to give it a mini makeover.
Monday, December 9, 2013
Handmade French Christmas Postcard Ornaments

Thursday, December 5, 2013
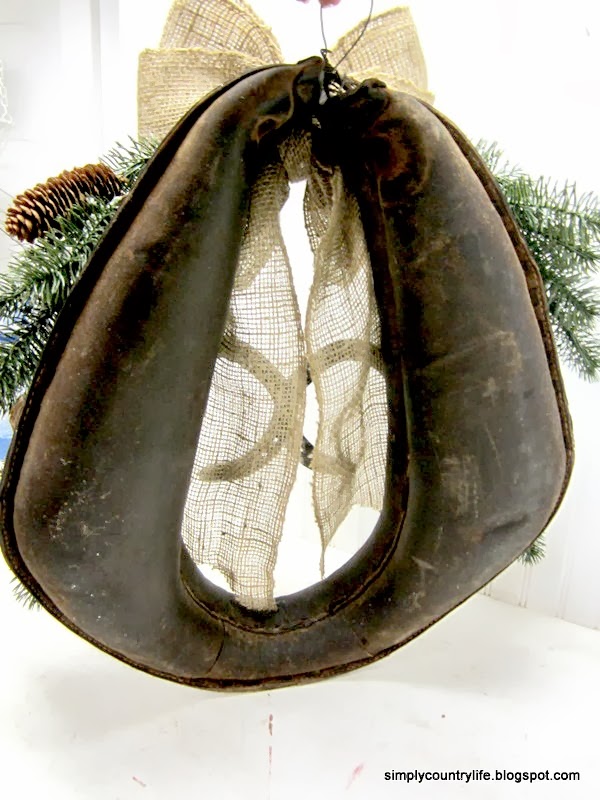
Old Leather Horse Harness Christmas Wreath
Friday, November 22, 2013
Old Tin Measuring Cups Turned Christmas Decor

Friday, November 15, 2013
A Chicken Feeder and a Mason Jar

Friday, November 1, 2013
Handmade Holiday Ticking Pillow Covers with Vintage Images

Saturday, October 26, 2013
Bottle Brush Trees and Old Wooden Spools

I had a few ideas of what I thought I would use the spools for.
My first thought was to use them as hooks on a coat/hat rack, but then the cooler weather changed my direction.
I decided to jump ahead a little to CHRISTMAS!!!!
Friday, August 30, 2013
Dated Canisters are Given a New Life
I picked up a set of dated glass canisters with wood lids that had porcelain knobs quite a while back from Goodwill. I had the best of intentions to paint the lids and add great knobs to them, but there they sat. Knobs removed from the wooden lids, lids sanded and ready to be painted and no inspiration.

I took a trip to Hobby Lobby to pick out new knobs in hopes that I would find some that moved me. There were too many choices. I just couldn't decide, so the canisters sat for another year, unfinished.
Recently, I have tried my hand at transferring images onto wood by using wax paper. You can read more about that process here, if you would like. While I was looking for an image for a different project I found these fantastic number images and it hit me! The canisters. Put the numbers on the canister lids! I purchased the images for number 1, 2 and 3 from this shop on Etsy.
Now I had to climb into the storage loft in my shop and dig out the canisters. I painted the wood lids with a butternut yellow paint first and then white paint. Once they were dry I gave the edges a light distressing so that the yellow would peek out in places. Then using my wax paper I printed the images and tranferred them onto the lids. I darkened the numbers in a little with a black colored pencil.
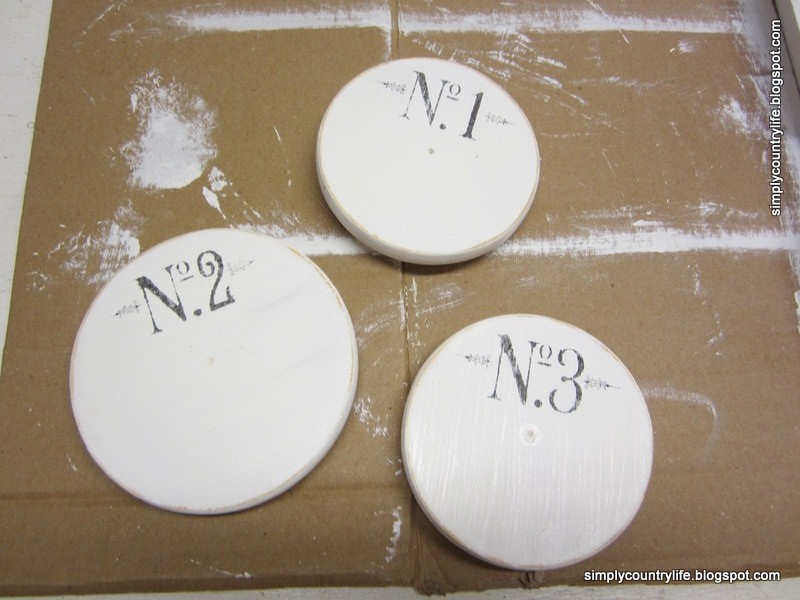
Lastly, I sprayed a coat of clear matte protective sealer on them before adding new knobs to them.
I happened to have knobs that matched the number images in color and design, so I used them.


These old canisters now have new look!


They are heading to my Etsy shop, as they just don't work in my little rustic log cabin home.
I think the next project I work on should be something for me to keep, for my home :)
'til next time,
Adina
Linking to:


Friday, August 9, 2013
Cheese Box Turned Shabby Farmhouse Storage
Here's another image transfer project.
It's totally making me wish I had an adorable farmhouse to use it in.

This started out as a plain old wood Wisconsin cheese box from Goodwill.

The box itself was in good shape. I grabbed it as soon as I saw it, but then I wasn't sure, so I put it back. I grabbed it again a few minutes later and still wasn't completely sure what I could do with it. I bought it, brought it home and began looking online for a graphic image that I could transfer onto it. It wasn't long before I spotted this cow image HERE and purchased it. I wanted a dairy/cow/farm image to coincide with the fact that this was a cheese box.

This is the second project that I have used wax paper to transfer an image onto painted wood.
You can see the other project and read more about how this is done HERE.
The Etsy shop I purchased the image from even provided a reversed image, which saves a step.
I painted the box white and lightly distressed the edges before I transferred the image onto the top.

The image wasn't quite as dark as I would've liked for it to be so I used a black colored pencil and lightly colored it in a little.


You can kindof see a difference in the two pictures after I colored it in.
I also sprayed a clear matte sealer on the box to help protect it.


That's it. I love how it turned out!
'til next time,
Adina
Linking to:


Tuesday, July 23, 2013
Don't Throw that Away - Furniture Salvage Upcycled into a Coat Rack
You gotta love other peoples trash!
This piece of furniture salvage was going to be discarded because most of the ornate wood carvings were broken and had fallen off of it. I loved the shape of it and was more than happy to save it from the burn pile.

This is a picture after I had removed the broken trim pieces and had cleaned it up and sanded it. I was able to keep the trim piece in the top center. I like that it adds a little something to it.

Once this was sanded, I painted it a creamy off-white color, distressed the edges a little and gave it a clear matte finish.


Originally I was thinking I wanted to make this piece into a sign that said ANTIQUES on it, but then I changed my mind. Coat rack kept coming to mind now. The next step was to visit a Hobby Lobby to see if they had any hooks that caught my eye and they did! I grab 4 of these brass hooks while they were on 50% off and also purchased a package of brass screws to attach them with.


Attaching the hooks was trickier than it would seem. A five minute task turned into a half an hour task. Two of the screws did not want to screw in. I'm guessing it was because the wood might have had a knot where I was trying to screw them in at. I had to predrill small holes in order to get the screws to go in. Then the head of one of the screws broke off while screwing it in. Now I had to figure out how to remove a broken screw that was sharp and sticking out of the wood. Needlenose pliers eventually did the job of removing the broken screw. Finally, all four hooks were securely attached and the coat rack was finished!


I'm always looking at things with a creative eye to see what I can turn it into.
I love how this piece turned out, but I don't have the room for it in our little log cabin so it's going in my Etsy shop.
I'm off to start another project!
'til next time,
Adina
Linking to
Subscribe to:
Posts (Atom)