Tuesday, June 26, 2012

Scrap Wood Patriotic Star Wreath

While we were building our log cabin, I saved ten small scrap pieces of wood from the burn pile and two years later I have turned them into stars!


I made two identical star wreaths. Each star used five pieces of the wood scraps. I arranged them into a star and glued the pieces together.


Then I brushed a vinegar solution onto them to age the wood. (let rusty metal sit in  vinegar overnight to make this solution)


Once the stars dried for a little while in the sun today I attached red and blue pip berries, along with a burlap bow and an american flag with floral wire.


That's it. All done. I hung one on the front door of our cabin and the other one is for sale in my Etsy shop.


Every time we burned scrap wood while building I cringed. I had plans for all of it, however, my husband kept reminding me that as long as we were building there would be more scraps.

Don't you just love making a project from trash!

'til next time,
Adina


                                                                        Linking to


Monday, June 25, 2012

Patriotic July 4th Planters

I thought I would share a few quick and easy patriotic planters that I put together for the upcoming July 4th holiday.


A little paint added to an old weathered wooden orchid planter gave this plant a quick patriotic touch.


The horizontal wood slats made this an easy project. I just painted every other slat red, the opposite slats cream and a navy square in the corner. I cut two small stars out of a thin piece of wood and painted them with the same cream color and just glued them directly onto the planter. I'm still debating scuffing it up a little to give it a worn look and then sealing it. Actually, I think I will do that tonight!


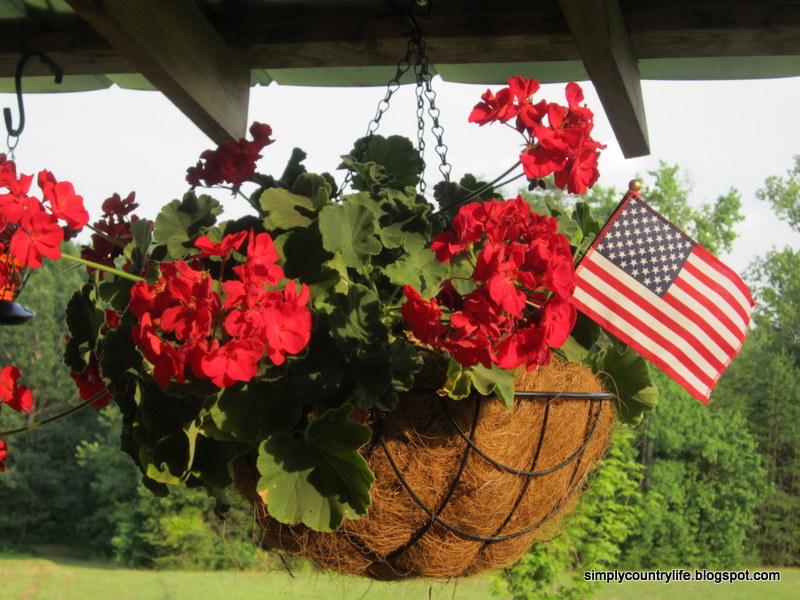
I wanted to add a little holiday decor outside as well, so I stuck small American flags into the three hanging red geraniums on the front porch.


Much to my surprise, while I was watering the plants today, I found a bird nest in one of them that has eggs in it. I hope I didn't disturb it too much.


I have had the joy of watching three different nests of babies grow up and fly away so far this spring and look forward to watching this new nest also!


Lastly, I happened upon this fabulous vintage wheelbarrow at a flea market a couple of months ago and knew I just had to have it.  To add another patriotic touch outside, I planted red, white and blue annuals in it.


I hope you enjoy my patriotic planters as much as I do:)


'til next time,
Adina

Monday, June 4, 2012

Rusty Strainer Planter Mini Makeover

An old rusty strainer turned planter makes a bright and cheerful summer centerpiece!


I love gerber daisies and picked this one up at our local grocery store today to use as a temporary centerpiece. It will get planted outdoors in a couple of weeks, but in the meantime I get all of this cheerfulness on my table!


Half of the fun is finding a unique planter to display it in. I chose an old rusty strainer for this one.


Super easy assembly - Step 1 - place a plastic liner in the bottom of the strainer 


Step 2 - place potted plant in the liner and surround with moss to cover the liner and pot


There you have it!

 Don't you just love finding fun things to use as planters? I know I do.
Let me know if you have any clever ideas for planters. I'd love to hear your thoughts.

'til next time,
Adina

Wednesday, May 16, 2012

Spice Rack Paint Storage Mini Makeover

While laying in bed one night, an idea hit me. Does that happen to anyone else? I think I need to keep a notepad next to my bed. I'll have a great idea then fall asleep and when I wake up, all that I can remember is that I had a great idea, but do not remember what it was. Anyways, I remembered this one.


I "upcycled" an old spice rack by painting it white and hanging it in my shop to hold my small bottles of acrylic paints. It's size works perfectly!


Here's an updated pic of the outside of my shop, that my husband and I built this past fall and winter. It looks a little different now then when were building the greenhouse boxes on the back. 


Spice racks always seem to pop up at thrift stores or yard sales for pennies. Have you used an old spice rack for something other than holding spices. I'd love to hear about your ideas, because I have a few stored away still.

Have a great day!

'til next time,
Adina

Monday, May 14, 2012

Burlap & Wood Love Frame Collage

I've been imagining this one for a while now and am happy to be able to finally show it off! The inspiration came from all of the different collage frames and frame gallery walls that seem to be everywhere lately. 


After a trip to Goodwill and $4 later I was well on my way to starting my frame collage.


I had black primer and black spray paint on hand already, so I gave the mismatched frames a couple coats of each.


Much to my dismay, when I asked my husband for help gluing the frames together, he told me I should've glued them before painting them. Apparently wood glue doesn't adhere to paint very well. I had to sand the paint off of the edges of the frames before I glued them together. Once I finished sanding the edges, I just needed to come up with a design and glue them together. He was kind enough to let me borrow his wood glue and his clamps.


Two days later I removed the clamps and used a small brad nail gun to shoot small nails through the portions of the frames that were glued, just as an extra step to make sure that the collage was good and sturdy. I had to spray paint them again to cover the edges that I had sanded.

In the meantime, while the frames were drying, I cut pieces of scrap burlap to fit the cardboard backs of four of the frames and glued the burlap onto the cardboard with spray adhesive.


Now I have a secure frame collage and burlap pieces for the four frames that I want to spell LOVE and two empty frames for pictures.


I decided to find a font online and print the letters LOVE on a manilla file to create my own stencils.


I cut the letters out of the manilla files with an exacto knife and painted the letters on the burlap cardboard pieces with black acrylic paint and a sponge brush. Now all I had to do was wait for the black paint to dry on the burlap, attach a sawtooth hanger on the collage, clean the glass pieces, print two pictures and put the frames back together.


The entire collage measures 27" across and 20" tall. There are four 5x7 frames and one 4x6 frame. The total out of pocket cost was $4.


I already have frames to make another one with the word FAMILY. I'm debating using vinyl letters directly on the glass without the cardboard backing. Tons of possibilities with this one. You can even use an already made frame collage to save time. I've seen them at Old Time Pottery and Wal-mart for as low as $10. I've thought about using scrapbook paper with solid color letters over it in the frames as well, with color coordinated paint on the frames to match the scrapbook paper.

Let me know what you think.

'til next time,
Adina


Linking to


Photobucket

Friday, May 11, 2012

Cabin Chronicles Part 4

Now that the cabin is under roof, it is time to start closing it in. I will apologize in advance for not having the foresight to always have a camera with me. There are a few steps that do not have "during" pictures.

I'm going to back up to Part 3 for a minute. While we were building rafters to support the roof tin we also framed out the upstairs loft walls.


Here's a view from the inside downstairs looking out of the front door.


At this point, I was beginning to have my "moments". I didn't think we would ever get finished with this project. I did not sign up for this. I really wanted my beach life back. Playing in the ocean seemed so much more enticing than spending another weekend in the blistering sun or freezing cold with a hammer and a saw. As discouragement was setting in, my husband shows up with a pair of rocking chairs for the front porch. WHY? Why rocking chairs and why now? If only they were beach chairs. He did have a reason. He sat me down in one of the chairs and had me envision what it would be like to be sitting here, one day, when the construction was complete. I guess it helped a little, if I closed my eyes really tight.


Enough dreaming, back to measuring and cutting.

We had purchased old windows that we refurbished for use in the cabin and needed to cut openings to fit two smaller windows on both sides of the chimney upstairs along with a larger window for the opposite wall upstairs. We also needed to cut four openings downstairs in the log walls to fit two windows on each side of the cabin. Once the openings were cut out we framed them in 2x6 lumber and hung the old windows. We also framed the openings for the front and back doors with 2x6 lumber and installed both doors.


This is the part with the missing pictures, so here are a couple that you can see the front and back doors in, however, the chinking in between the logs is already done in these pics and we haven't really done it yet.

Now we were able to start closing in the upstairs walls with really heavy, thick plywood and then we proceeded to cut battons to add some character to the plywood walls. Then we went on a hunt for a stain that would closely match the log color and were not successful at finding any, so we mix our own blend of three different colors to achieve what we thought was a pretty good match. We painted the plywood and battons with our stain blend with a couple of coats to make sure it was sealed and protected.


Maybe you can pretend that the chinking isn't completed in the above picture also, because I do not have pics of these steps. Although I probably should have. My husband, who is deathly afraid of heights and myself trying to balance large sheets of plywood on ladders with hammers. I bet it was a sight:)

The next step to close the cabin in is the chinking and I will share that with you next time.

Thanks again for following along. I hope you have a great weekend and remember, if you get discouraged in the midst of a huge undertaking, stop and daydream a little about the end result of your hard work. It actually does help to picture it complete and imagine the sense of accomplishment you will feel then:)
 
Sometimes it helps to look back at where you started to see just how far you've come. If you'd like to look back to where we started go to Part 1.
 
'til next time
Adina