

Showing posts with label burlap. Show all posts
Showing posts with label burlap. Show all posts
Wednesday, September 3, 2014
How to make Your Own Cotton Boll Branch Wreath
Tuesday, July 8, 2014
Horse Collar and Horseshoe Sunflower Wreath

Thursday, June 19, 2014
Dirty White Cabinet gets a Fresh New Farmhouse Look

Wednesday, June 4, 2014
Super Easy Patriotic Burlap Banner

Monday, May 26, 2014
Patriotic Burlap Wreaths

Tuesday, May 13, 2014
Free Chair Turned into a Planter

Friday, April 4, 2014
Handmade Burlap Wreaths and My First Spring Festival

Burlap wreath with white sunflowers and a burlap bow
Thursday, March 13, 2014
Barb Wire and Horseshoe Wreath

Tuesday, March 11, 2014
Spring Daffodil Watering Can Centerpiece

I found this set of three cute watering cans last fall
and purchased them to use this spring.
Wednesday, March 5, 2014
Springtime Floral Wreath in Galvanized Container

I'm a sucker for anything galvanized,
so when I found these containers for 80% off last summer I grabbed four of them.
Monday, March 3, 2014
Burlap Easter Spring Wreath with Nest and Eggs

Monday, January 27, 2014
How I Upcycled a Sweater into a Valentines Day Wreath

I had a white sweater that I was going to wear on Sunday
and when I put it on, I noticed there was a gaping hole right under the turtleneck.
I don't know how it got there and I hope it wasn't there the last time I wore it.
Thursday, December 5, 2013
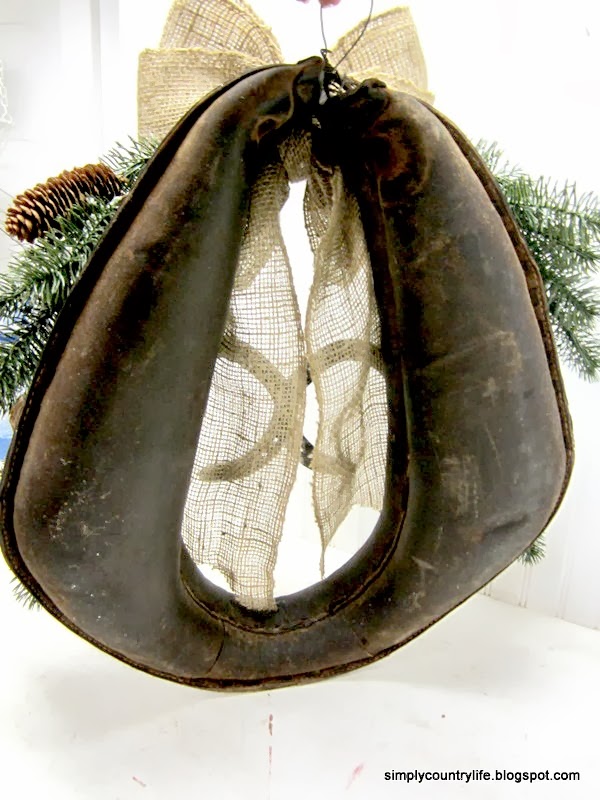
Old Leather Horse Harness Christmas Wreath
Sunday, December 1, 2013
Burlap and a Dollar Tree Ornament

Friday, November 22, 2013
Old Tin Measuring Cups Turned Christmas Decor

Sunday, November 10, 2013
Rustic Pine Cone and Burlap Wreath

The inspiration for this wreath came from Pinterest.
Friday, September 13, 2013
Rustic Burlap and White Pumpkin Fall Wreath
Oh how I love fall. The scents, the cooler temps, the colors, the coziness of it all.
I wasn't going to start decorating for Fall until the first weekend in October, but with the temps dropping a little and all of the wonderful inspiration around, I just couldn't help myself. I had to make something for Fall. I dug around in my craft stash and found a few things that got me started on this wreath.

This is an image I pinned last year and it is also where I drew my inspiration from for this wreath.

I love the neutral, rusticness of it. (is that a word?)
In my craft stash I found everything I needed to make this wreath. I had 6 faux orange pumpkins, scrap burlap, twine, stencils, paint and a grapevine wreath.
First, the orange pumpkins were getting a creamy white makeover to start this project.

I removed the brown stems from the pumpkins so that they wouldn't get painted white. I put them back in after the pumpkins were dry. I stuck the pumpkin floral pick stems in styrofoam so that I could spray them from all angles. This took a couple of coats of paint. In between these coats I started making the GIVE burlap pennant banner.


I cut a length of twine and also cut four 2" wide by 2 1/2" long triangles out of a manilla file folder to use for the letter pennants. I cut squares of burlap large enough to fold over the twine and cover both sides of the manilla triangles. With spray adhesive glue I attached the burlap to the triangle and them trimmed around it. I did this for each of the four letters.
Once the pennant banner was ready and the pumpkins were dry, I painted the letters on using stick on reusable stencils and black acrylic paint.


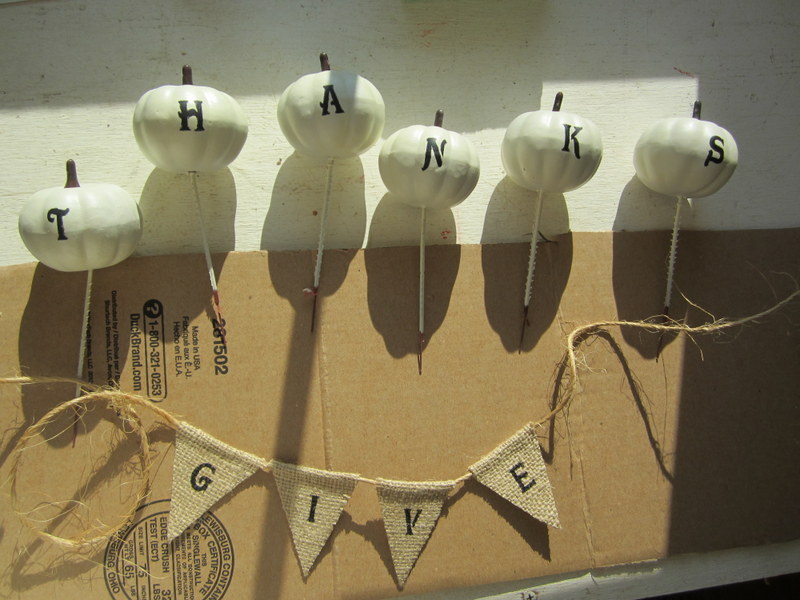
Notice the brown pumpkin stems are back on the pumpkins now :)
I was stumped at this point because the grapevine wreath I had wasn't large enough to accomodate all of my pumpkins without making the word THANKS look funny.
Then I remembered a different grapevine wreath, kindof a basket type, that I had picked up at a yard sale for a buck earlier this summer. It was larger and because it had an open basket type bottom, it worked great!
I tied the twine ends from the pennant around the top part of the wreath and started arranging the pumpkins on the bottom part. I used the stems to weave through the grapevine to hold them in place. The wreath looked a little bare at this point, so I added fall leaves and didn't like them and started looking for something else. That's when I found some preserved green moss. I placed it around the pumpkins and I think it was the finishing touch that the wreath needed. It kept it neutral, but added a little pop.


I'm thinking I'm liking the white pumpkins this year.
What about you, do you prefer orange or white?
Happy Fall decorating.
'til next time,
Adina
Linking to:
Vintage Inspiration Party
The Pin Junkie
Craftberrybush
Farmhouseporch
A Night Owl Blog
Shabbynest
Tatertots and Jello
Six Sisters Stuff
Funky Junk Interiors
Its Overflowing
Uncommon Designs
Home Stories AtoZ
Cherished Bliss
Your Homebased Mom
Flamingo Toes
Linking to:
Vintage Inspiration Party
The Pin Junkie
Craftberrybush
Farmhouseporch
A Night Owl Blog
Shabbynest
Tatertots and Jello
Six Sisters Stuff
Funky Junk Interiors
Its Overflowing
Uncommon Designs
Home Stories AtoZ
Cherished Bliss
Your Homebased Mom
Flamingo Toes


Monday, September 10, 2012
Upcycled Ornate Frame into a Unique Clock
These vintage metal frames, Made in Italy, turn up every so often at thrift stores and I always seem to scoop them up. Sometimes they have glass or a mirror and sometimes they don't. This guy didn't have anything in the frame other than the original backing. I debated what to do with it. They are popular enough just left empty, but while I was taking the backing out of the frame, it hit me to cover it in burlap. My first thought was to paint a word or silhouette on the burlap and then, I thought, what about a clock?

Why not a clock, so here goes my creative process on this one.
The first thing I did was trace the backing of the frame onto burlap, cut the burlap oval out and glue it onto the backing with craft spray adhesive.


Then I moved onto the frame. I sanded and cleaned it so I could paint it.

Well, as you can see, first I painted it white. The white didn't contrast enough with the burlap, so then I painted it black and forgot to take a pic.

Then I made a quick trip to Hobby Lobby to buy the numbers and the clock mechanism.
My wonderful husband drilled a hole in the middle of the burlap covered backing for me while I spray painted the clock numbers, hands and bolts black. (They were gold).


Once everything was dry, it was time to glue the numbers into their places and assemble the clock mechanism and hands according to the directions on the package.


I placed the required AA battery into the clock and it works!!!
Well, there you have it, my upcycled clock!

I have 3 additional frames like this in different sizes, any ideas on what to do with them?
Let me know what you think.
'til next time,
Adina
Linking to:
Tuesday, June 26, 2012
Scrap Wood Patriotic Star Wreath
While we were building our log cabin, I saved ten small scrap pieces of wood from the burn pile and two years later I have turned them into stars!

I made two identical star wreaths. Each star used five pieces of the wood scraps. I arranged them into a star and glued the pieces together.


Then I brushed a vinegar solution onto them to age the wood. (let rusty metal sit in vinegar overnight to make this solution)

Once the stars dried for a little while in the sun today I attached red and blue pip berries, along with a burlap bow and an american flag with floral wire.


That's it. All done. I hung one on the front door of our cabin and the other one is for sale in my Etsy shop.

Every time we burned scrap wood while building I cringed. I had plans for all of it, however, my husband kept reminding me that as long as we were building there would be more scraps.
Don't you just love making a project from trash!
'til next time,
Adina
Linking to

Monday, May 14, 2012
Burlap & Wood Love Frame Collage
I've been imagining this one for a while now and am happy to be able to finally show it off! The inspiration came from all of the different collage frames and frame gallery walls that seem to be everywhere lately.

After a trip to Goodwill and $4 later I was well on my way to starting my frame collage.

I had black primer and black spray paint on hand already, so I gave the mismatched frames a couple coats of each.


Much to my dismay, when I asked my husband for help gluing the frames together, he told me I should've glued them before painting them. Apparently wood glue doesn't adhere to paint very well. I had to sand the paint off of the edges of the frames before I glued them together. Once I finished sanding the edges, I just needed to come up with a design and glue them together. He was kind enough to let me borrow his wood glue and his clamps.


Two days later I removed the clamps and used a small brad nail gun to shoot small nails through the portions of the frames that were glued, just as an extra step to make sure that the collage was good and sturdy. I had to spray paint them again to cover the edges that I had sanded.
In the meantime, while the frames were drying, I cut pieces of scrap burlap to fit the cardboard backs of four of the frames and glued the burlap onto the cardboard with spray adhesive.


Now I have a secure frame collage and burlap pieces for the four frames that I want to spell LOVE and two empty frames for pictures.

I decided to find a font online and print the letters LOVE on a manilla file to create my own stencils.


I cut the letters out of the manilla files with an exacto knife and painted the letters on the burlap cardboard pieces with black acrylic paint and a sponge brush. Now all I had to do was wait for the black paint to dry on the burlap, attach a sawtooth hanger on the collage, clean the glass pieces, print two pictures and put the frames back together.


The entire collage measures 27" across and 20" tall. There are four 5x7 frames and one 4x6 frame. The total out of pocket cost was $4.


I already have frames to make another one with the word FAMILY. I'm debating using vinyl letters directly on the glass without the cardboard backing. Tons of possibilities with this one. You can even use an already made frame collage to save time. I've seen them at Old Time Pottery and Wal-mart for as low as $10. I've thought about using scrapbook paper with solid color letters over it in the frames as well, with color coordinated paint on the frames to match the scrapbook paper.
Let me know what you think.
'til next time,
Adina
Linking to


Metamorphosis Monday at betweennapsontheporch.blogspot.com
uncommonly-yours-link-party-28 at Uncommon Designs
uncommonly-yours-link-party-28 at Uncommon Designs

Subscribe to:
Posts (Atom)