Oh how I love fall. The scents, the cooler temps, the colors, the coziness of it all.
I wasn't going to start decorating for Fall until the first weekend in October, but with the temps dropping a little and all of the wonderful inspiration around, I just couldn't help myself. I had to make something for Fall. I dug around in my craft stash and found a few things that got me started on this wreath.
This is an image I pinned last year and it is also where I drew my inspiration from for this wreath.
I love the neutral, rusticness of it. (is that a word?)
In my craft stash I found everything I needed to make this wreath. I had 6 faux orange pumpkins, scrap burlap, twine, stencils, paint and a grapevine wreath.
First, the orange pumpkins were getting a creamy white makeover to start this project.
I removed the brown stems from the pumpkins so that they wouldn't get painted white. I put them back in after the pumpkins were dry. I stuck the pumpkin floral pick stems in styrofoam so that I could spray them from all angles. This took a couple of coats of paint. In between these coats I started making the GIVE burlap pennant banner.
I cut a length of twine and also cut four 2" wide by 2 1/2" long triangles out of a manilla file folder to use for the letter pennants. I cut squares of burlap large enough to fold over the twine and cover both sides of the manilla triangles. With spray adhesive glue I attached the burlap to the triangle and them trimmed around it. I did this for each of the four letters.
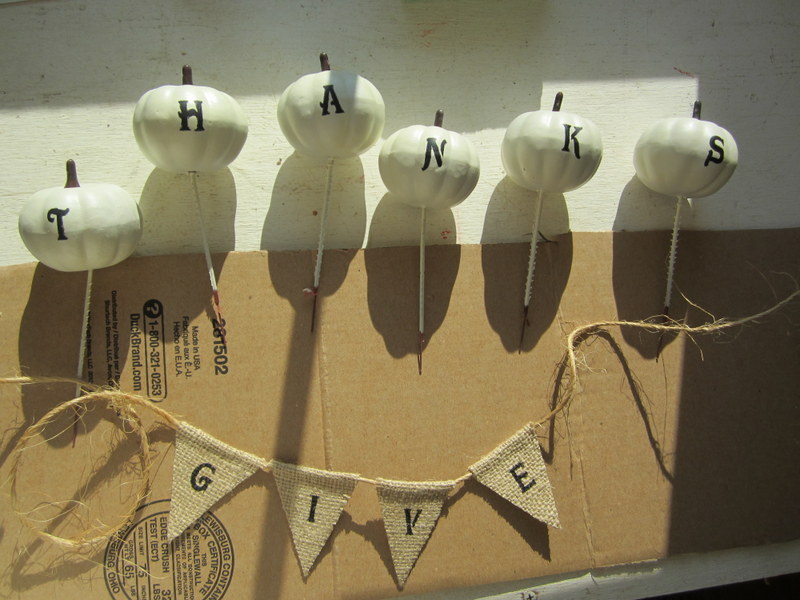
Once the pennant banner was ready and the pumpkins were dry, I painted the letters on using stick on reusable stencils and black acrylic paint.
Notice the brown pumpkin stems are back on the pumpkins now :)
I was stumped at this point because the grapevine wreath I had wasn't large enough to accomodate all of my pumpkins without making the word THANKS look funny.
Then I remembered a different grapevine wreath, kindof a basket type, that I had picked up at a yard sale for a buck earlier this summer. It was larger and because it had an open basket type bottom, it worked great!
I tied the twine ends from the pennant around the top part of the wreath and started arranging the pumpkins on the bottom part. I used the stems to weave through the grapevine to hold them in place. The wreath looked a little bare at this point, so I added fall leaves and didn't like them and started looking for something else. That's when I found some preserved green moss. I placed it around the pumpkins and I think it was the finishing touch that the wreath needed. It kept it neutral, but added a little pop.
I'm thinking I'm liking the white pumpkins this year.
What about you, do you prefer orange or white?
Happy Fall decorating.
'til next time,