This old medicine cabinet was a barn find during a recent trip to Pennsylvania. I'm not even sure the owners knew they still had it. When I pulled it out from under a table and asked them how much they were asking for the piece they looked very confused. Maybe they were just wonderring why I wanted it. It was $1. SCORE!!!! Here it is, in all it's painted up dirty glory.
The first layer of paint was turquoise and then a second layer of a pinkish peach paint covered that and then add some dirt and spider webs.
Check out the inside. Never painted! The back is made from old tongue and groove beadboard.
My husband was with me when I spotted this and I think even he wasn't sure what I would do with it, but I had a plan.
First things first, the cabinet received a good scrubbing. Then I proceeded to remove the old hinges.
Unfortunately, they had a couple layers of paint on them also and were a bit of a challenge to remove. Eventually I was able to get them off. Then I soaked them in paint remover. I wanted to reuse them and was hoping they would have an aged look after the paint was gone.
With the hinges removed, I was able to separate the door and the main part of the cabinet. The next step was to give both pieces a good sanding, then I could proceed with my vision.
I painted the edges of both pieces black.
I did this in hopes that when I painted the entire piece white and distressed it, the black edges would show. It kindof worked.
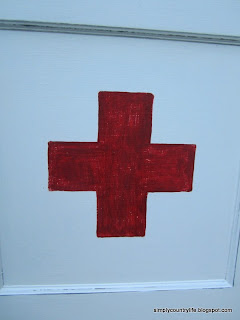
It took three coats of white paint to get good, even coverage everywhere. Once both pieces were painted and lightly distressed I designed a first aid cross in the center of the door...
...and painted it red.
This took about four coats of red paint to get a solid colored cross. I distressed the cross a little too.
Now, onto the main part of the cabinet. First, I cleaned it again and then gave it a coat of danish oil to help protect the natural wood.
Back to the old hinges. After removing them from the paint remover and rinsing them really well, I used a wire brush and was able to remove all of the paint from them and the screws. They looked aged and I was thrilled that I was going to be able to use the original hinges again.
I screwed the new, old hinges to the cabinet and the door. Once it was put back together I sealed the outside of the cabinet with a protective clear matte sealer.
Here it is, after a little "first aid" :)
I'm more in love now. My husband was even a little impressed with the transformation. If only I could show the original owners in Pennsylvania. I think they'd be pleased that their cabinet has found a new life. What do you think?
'til next time,
Adina
Linking to:


Just wanted you to know that you were featured on my blog! Thanks so much for sharing at The Scoop!...hugs...Debbie http://confessionsofaplateaddict.blogspot.com/2013/09/vintage-favorites-from-scoop.html
ReplyDeleteYou did such a great job with this medicine cabinet Adina! Love it!
ReplyDeleteThank you Ritchil!
Deletethat is great. I would love to make one of those out of an old cabinet door. I love to recycle.
ReplyDeleteVintagehoneybee.blogspot.com
What a great idea. I love the red cross on it.
ReplyDeleteThis turned out great. I bet they were confused...probably thought no one would want it, so they left it under that table...until you came along.
ReplyDeleteGreat price too.
Looks good now.
...via CaCC @MRL,
Pat
12 Must have Contents Of An Equipped First Aid Box brought to you by first aid course Brisbane
Delete1. Bandages
This is used to secure dressings made to the wound.
2. Soap
Used in cleaning wounds and washing out foreign bodies.
3. Antiseptic wipes or sprays
This is used for reducing the risk of infection in abrasions or other wounds.
4. Scissors
This is used in cutting materials for dressing or flesh itself.
5. Alcohol Pads
This is used for sanitizing equipments or broken skin.
6. Thermometer
This is used in measuring the body temperature of the affected individual.
7. Cotton wool
This is used In applying medications and cleaning of wounds.
8. Aspirin
Primarily used for pains and also serves as an antiplatelet.
9. Painkillers
This is used to reduce pains and some include paracetamol, panadol.
10. Hydrogen peroxide
Basic First Aid Course Treatment Procedures For Cosmetologists
Treatment for Burns
Burns could result when the cosmetologist or their clients mishandles a hot equipment such as the blow dryer.
The seriousness of the burn depends on the amount of burnt surface area, body part burnt and age of the victim.
Applying First Aid Treatment To Burns
• Use a wet soft cloth to cool the area.
• Continue with cooling the affected area to relieve the burning sensation.
• Remove any tightening material, most importantly those around the burnt area.
Once the burning sensation is relieved, clean up the burnt area with cotton wool soaked with aspirin...
• Then continue with dressing up the burnt area.
Hello, Nice post. After checking out a few of the articles on your web site, I seriously like your technique of blogging. I bookmarked it to my bookmark website list and will be checking back soon. Please visit my web site firstaidcourseonline.com.au. Best courses sippy downs service provider.
ReplyDelete