

Showing posts with label paint. Show all posts
Showing posts with label paint. Show all posts
Friday, April 11, 2014
Spice Drawer Apothecary Cabinet Makeover
Monday, March 17, 2014
Red Repurposed Cabinet Door Chalkboard

Monday, March 10, 2014
Headboard Repurposed into Bon Appetit Sign

This sign started out as part of a headboard.
Monday, February 24, 2014
Thrift Store Bunny Makeover into Faux Chocolate Bunny
It was my version of one Martha Stewart had made.
I had searched for the faux chocolate bunny for a while before I found one at Hobby Lobby.
I checked this year and haven't found any there yet.
A few people have asked where I got the bunny from
and because they seem to be hard to find I thought I would share an inexpensive option.

You may already have everything you need to make one.
Thursday, February 20, 2014
I Joined the Chalkboard Bandwagon


Monday, February 10, 2014
Makeover Mondays - Trashy Bread Box

Tuesday, January 28, 2014
My 2nd Silhouette Project - Barnwood Cowgirl Up Horseshoe Sign

I cleaned up a piece of barnwood that I had leftover from building the kitchen cabinets in our cabin.
(you can check out our barnwood cabinets here)
Tuesday, January 21, 2014
Thrift Store Makeovers and My First Silhouette Cameo Project

Monday, December 16, 2013
Wood Christmas Sled Mini Makeover

It's definitely cute, but I decided to give it a mini makeover.
Thursday, October 24, 2013
Rustic Wood Framed Faux Winter Chalkboard
Brrr

I had been given this rustic wood frame back in the summer and have held onto it until now.
I love that it has the bark left on the outer edges.

Chalkboards are super "IN" right now and I have yet to create one, but it is on my list of projects. You know that list, the one that never seems to end.
Thursday, September 19, 2013
Upcycled Rustic Pumpkin Candle Holder


I kept a pair to use in our cabin and the other pair went into my Etsy shop.
You'll probably never look at chair feet the same now.
'til next time,

Linking to:
Craftberrybush, Farmhouseporch, The Pin Junkie, 52mantels, A Night Owl Blog, Shabbynest, Tatertots and Jello, Six Sisters Stuff, Funky Junk Interiors, Its Overflowing, Uncommon Designs, Home Stories AtoZ, Cherished Bliss, Crafts a la mode, A Peek into my Paradise, A Stroll Thru Life,
Knick of Time Interiors, Love Grows Wild, Your Home Based Mom, The Hankful House,
The Shabby Creek Cottage, Cozy Little House, My Repurposed Life, The Best of DIYKnick of Time Interiors, Love Grows Wild, Your Home Based Mom, The Hankful House,
Tuesday, September 3, 2013
An Old Handmade Medicine Cabinet Gets a Little First Aid
It was speaking to me. I loved it. I loved the fact that it was handmade. I loved the fact that even though it had a couple of coats of paint, the inside was left natural. I loved the fact that it had history.
This old medicine cabinet was a barn find during a recent trip to Pennsylvania. I'm not even sure the owners knew they still had it. When I pulled it out from under a table and asked them how much they were asking for the piece they looked very confused. Maybe they were just wonderring why I wanted it. It was $1. SCORE!!!! Here it is, in all it's painted up dirty glory.




This old medicine cabinet was a barn find during a recent trip to Pennsylvania. I'm not even sure the owners knew they still had it. When I pulled it out from under a table and asked them how much they were asking for the piece they looked very confused. Maybe they were just wonderring why I wanted it. It was $1. SCORE!!!! Here it is, in all it's painted up dirty glory.

The first layer of paint was turquoise and then a second layer of a pinkish peach paint covered that and then add some dirt and spider webs.

Check out the inside. Never painted! The back is made from old tongue and groove beadboard.

My husband was with me when I spotted this and I think even he wasn't sure what I would do with it, but I had a plan.
First things first, the cabinet received a good scrubbing. Then I proceeded to remove the old hinges.

Unfortunately, they had a couple layers of paint on them also and were a bit of a challenge to remove. Eventually I was able to get them off. Then I soaked them in paint remover. I wanted to reuse them and was hoping they would have an aged look after the paint was gone.
With the hinges removed, I was able to separate the door and the main part of the cabinet. The next step was to give both pieces a good sanding, then I could proceed with my vision.
I painted the edges of both pieces black.

I did this in hopes that when I painted the entire piece white and distressed it, the black edges would show. It kindof worked.

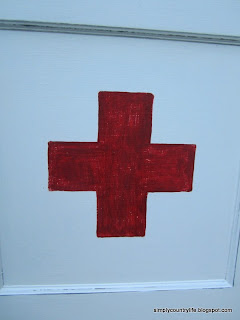
It took three coats of white paint to get good, even coverage everywhere. Once both pieces were painted and lightly distressed I designed a first aid cross in the center of the door...

...and painted it red.

This took about four coats of red paint to get a solid colored cross. I distressed the cross a little too.

Now, onto the main part of the cabinet. First, I cleaned it again and then gave it a coat of danish oil to help protect the natural wood.

Back to the old hinges. After removing them from the paint remover and rinsing them really well, I used a wire brush and was able to remove all of the paint from them and the screws. They looked aged and I was thrilled that I was going to be able to use the original hinges again.

I screwed the new, old hinges to the cabinet and the door. Once it was put back together I sealed the outside of the cabinet with a protective clear matte sealer.
Here it is, after a little "first aid" :)


I'm more in love now. My husband was even a little impressed with the transformation. If only I could show the original owners in Pennsylvania. I think they'd be pleased that their cabinet has found a new life. What do you think?
'til next time,
Adina
Linking to:
Subscribe to:
Posts (Atom)