

Showing posts with label kitchen. Show all posts
Showing posts with label kitchen. Show all posts
Thursday, June 19, 2014
Dirty White Cabinet gets a Fresh New Farmhouse Look
Friday, April 11, 2014
Spice Drawer Apothecary Cabinet Makeover

Monday, March 17, 2014
Red Repurposed Cabinet Door Chalkboard

Monday, March 10, 2014
Headboard Repurposed into Bon Appetit Sign

This sign started out as part of a headboard.
Monday, February 10, 2014
Makeover Mondays - Trashy Bread Box

Thursday, January 2, 2014
Cabin Chronicles Part 12 - Reclaimed Barnwood Kitchen Cabinets

Friday, August 30, 2013
Dated Canisters are Given a New Life
I picked up a set of dated glass canisters with wood lids that had porcelain knobs quite a while back from Goodwill. I had the best of intentions to paint the lids and add great knobs to them, but there they sat. Knobs removed from the wooden lids, lids sanded and ready to be painted and no inspiration.

I took a trip to Hobby Lobby to pick out new knobs in hopes that I would find some that moved me. There were too many choices. I just couldn't decide, so the canisters sat for another year, unfinished.
Recently, I have tried my hand at transferring images onto wood by using wax paper. You can read more about that process here, if you would like. While I was looking for an image for a different project I found these fantastic number images and it hit me! The canisters. Put the numbers on the canister lids! I purchased the images for number 1, 2 and 3 from this shop on Etsy.
Now I had to climb into the storage loft in my shop and dig out the canisters. I painted the wood lids with a butternut yellow paint first and then white paint. Once they were dry I gave the edges a light distressing so that the yellow would peek out in places. Then using my wax paper I printed the images and tranferred them onto the lids. I darkened the numbers in a little with a black colored pencil.
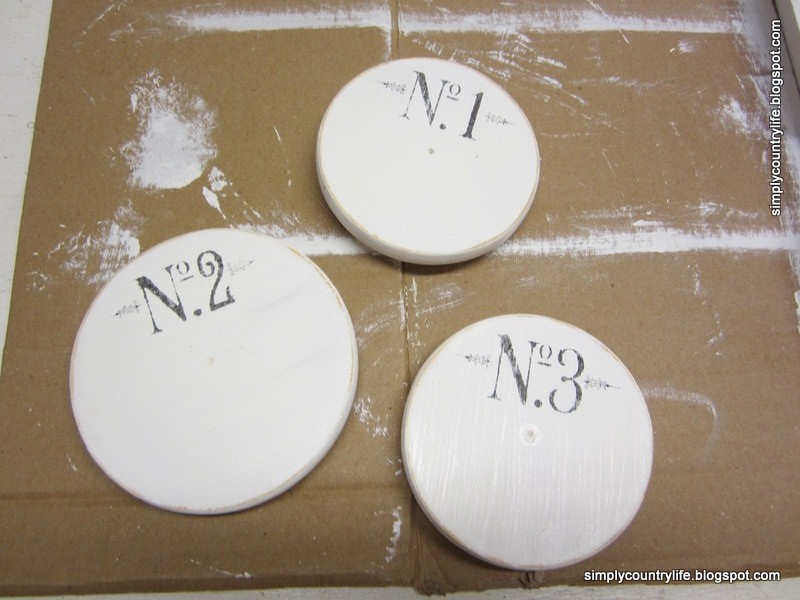
Lastly, I sprayed a coat of clear matte protective sealer on them before adding new knobs to them.
I happened to have knobs that matched the number images in color and design, so I used them.


These old canisters now have new look!


They are heading to my Etsy shop, as they just don't work in my little rustic log cabin home.
I think the next project I work on should be something for me to keep, for my home :)
'til next time,
Adina
Linking to:


Friday, March 9, 2012
Fresh Rosemary Herb Wreath
I absolutely love the smell of fresh rosemary! I find myself running my hands through my rosemary plant when I walk by it just so that I can smell my hands over and over. Am I crazy or does everyone do that??? I decided that since my plant flourished so well through the fall and winter I would trim it a little and bring some inside to enjoy.

I started with a heavier gauge wire shaped into a circle. Then twisted floral wire around small bunches of the rosemary trimmings and wrapped them around the wire circle until the wreath was equally full all of the way around. It took about ten wired bunches of rosemary for this small wreath. Each bunch was layered over the last bunch to cover the wires.


I started with a heavier gauge wire shaped into a circle. Then twisted floral wire around small bunches of the rosemary trimmings and wrapped them around the wire circle until the wreath was equally full all of the way around. It took about ten wired bunches of rosemary for this small wreath. Each bunch was layered over the last bunch to cover the wires.


I added a candle to the center of the wreath and placed it on a cutting board in the kitchen for now. I also thought about hanging it in the window with raffia or a strip of burlap.
You can always add different herbs or even make a wreath out of fresh lavender. Make the wreath larger for hanging or even smaller wreaths would work as napkin rings.


The scent of the rosemary can be enjoyed for weeks like this. Yummy.
'til next time,
Adina
Subscribe to:
Posts (Atom)